User Security
The User Security Maintenance allows you to create or edit a User Login. When you create a User, you are assigning your Employees a login to get into your LightWork system.
Note: If a User is not linked to an Employee, then the User will not be recognized by the system.
Basic Functionality
Creating a New User Security
Note: A new User can create their own Login credentials on the Login screen (if it is turned on), or an Administrator can create the Login credentials for each Employee in the User Maintenance Section (here).
-
New
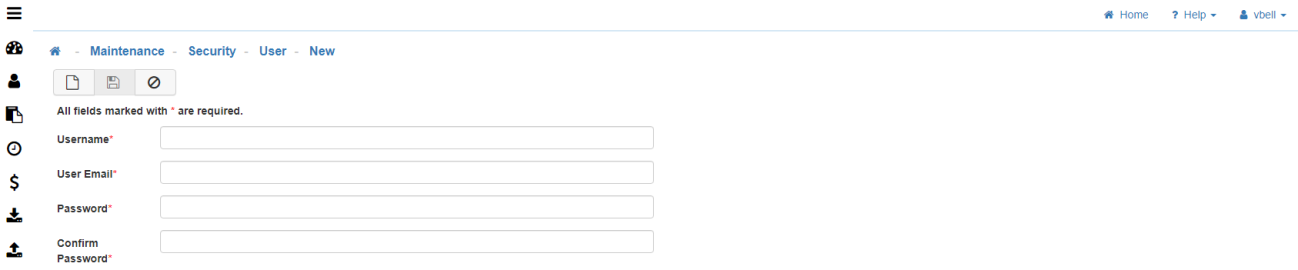
To create a new 'User Security' click on the 'New' icon. -
Username
The Username does not have to match the Employee name.
Note: Do not use any special characters in Username (E.g. / - ! @ *). -
User Email
Use the Employees company Email, as this can be used to send them Notifications/Alerts. -
Password
Enter the default Password you would like to select for the User.
Note: A User can change their Password once they sign in. -
Confirm Password
Re-enter the default Password to confirm. -
Save
Once you are satisfied with your selections, click on 'Save'. -
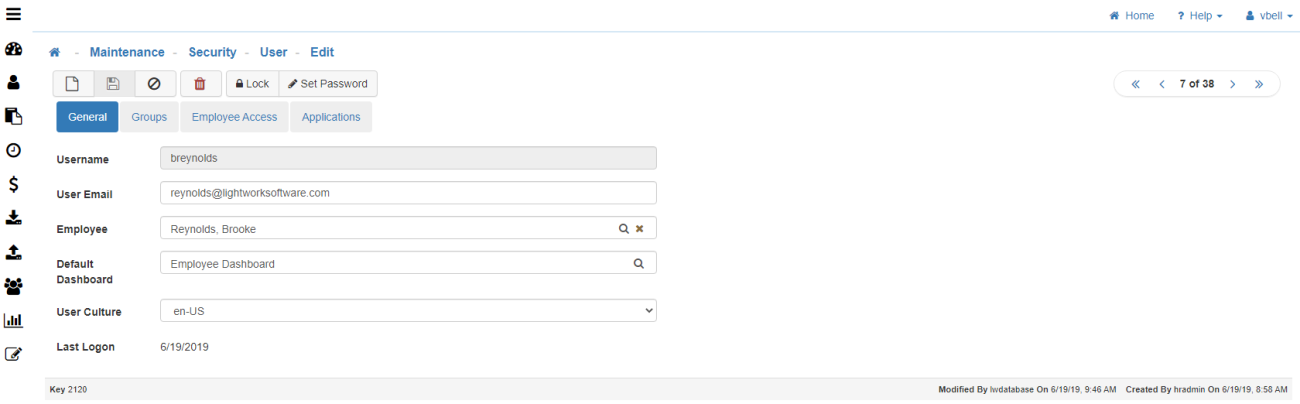
General Tab
-
Employee
Click the 'Search' icon and select the User's Employee name.
Note: By doing this you are associating the Username you created with an Employee. -
Default Dashboard
Select the Dashboard that will be associated with this User. -
User Culture
Select the User's preferred culture. -
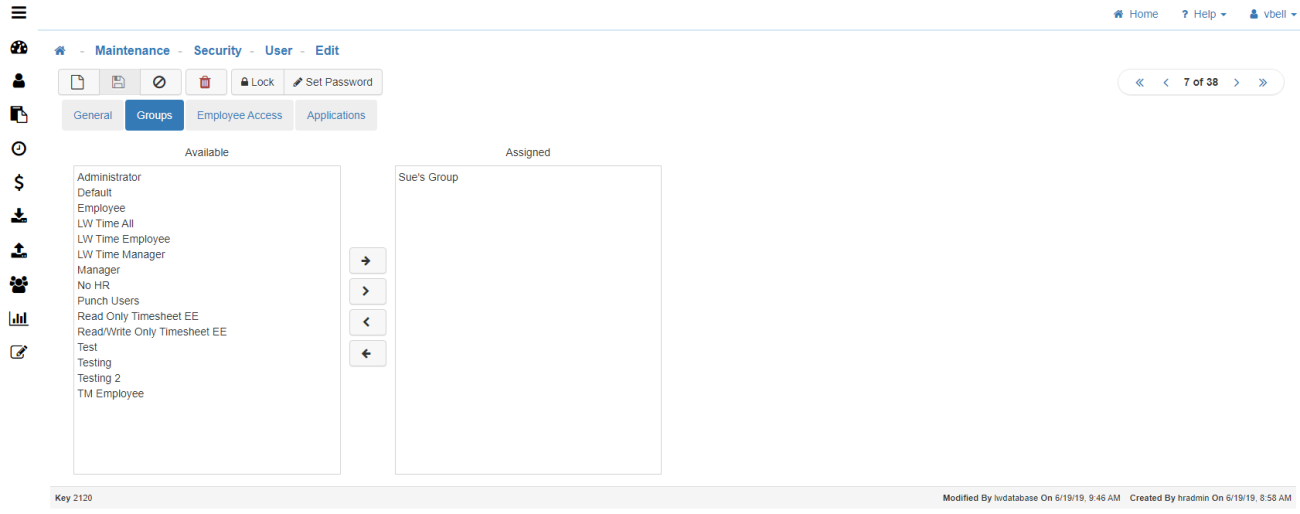
Groups Tab
-
Assign Groups
Assign the appropriate Group(s) to the User by choose the Group(s) from the available column and use the arrows to move the Group(s) to the assigned column.
Note: You can assign multiple 'Groups' to a User. In doing so, it layers what a User has access to based on the access level of each individual Group, allowing you to build levels of access incrementally. For example, if one Group has access to Timesheets and another to Journals, then that User, having been assigned to both Groups, will have access to both Timesheets and Journals. -
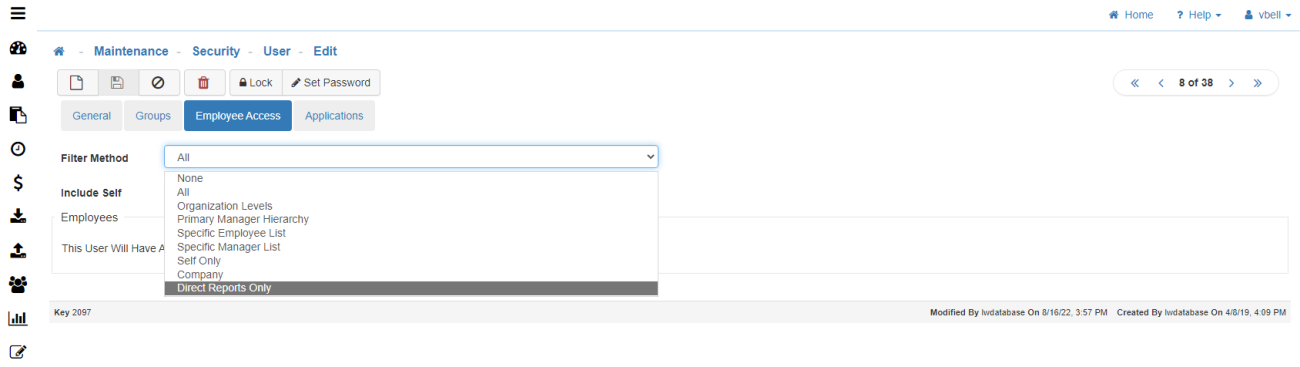
Employee Access Tab
-
Filter Method
The Filter Method allows you to define whom the User can view in the software from the HR list. There are many ways to filter through the Employees a User can have access to. (Such as Specific Employees, All Employees, Company, Direct Reports Only, etc.) These different Filter methods are helpful if some Employees work in multiple locations and have multiple Managers who need access to their information (I.e. Organization Level Filter).-
None
The selected User will not have access to any Users within LightWork. -
All
The selected User will have access to all Users within LightWork (this is typically used for Administrative Users). -
Organization Levels
The selected User will have access to other Users based on their Organization Level in LightWork. -
Primary Manager Hierarchy
The selected User will have access to all Employees who report directly to them, as well as any Employees who report to their Direct Reports. -
Specific Employee List
The selected User will have access to a customized list of Users. When this is selected you will have an Employee Lookup Tool that will allow you to customize which Users they will have access to within LightWork. -
Specific Manager List
The selected User will have access to a customized list of Users listed as Managers in LightWork. When this is selected you will have an Employee Lookup Tool that will allow you to customize which Managers they will have access to within LightWork. -
Self Only
The selected User will only have access to their own information. -
Company
The selected User will have access to other Users based on their Company in LightWork. -
Direct Reports Only
The selected User will only have access to Users that are their Direct Reports (typically used for Managers that have Employees that report directly to them).
-
-
Include Self
Allows the User to have access to their own information.
Note: The ‘Include Self’ checkbox is important because for certain functions you may not want an Employee viewing their information (I.e. their own Timesheet). -
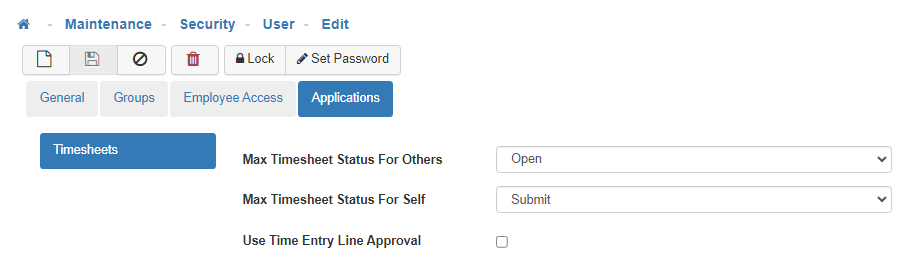
Applications Tab
This tab determines the Timesheet Status a Timesheet will change to when the User approves a Timesheet, and determines if 'Time Entry Line Approval' is allowed in the system. -
Example
In the example configuration above, this User would be unable to approve any Timesheets they have access to but would have the ability to submit their own Timesheet.
Note: The options available for selection in this two fields may differ based on Text Customizations in your LightWork system. -
Max Timesheet Status for Others
This field controls what the system will change the Timesheet to when a User tries to approve a Timesheet that is not their own. The level selected for this field controls the status when the Timesheet is Approved for others such as Direct Reports or any other Employee Timesheet the User has been given access to. -
Max Timesheet Status for Self
This field controls what the system will change the Timesheet to when a User tries to approve their own Timesheet. The level selected for this field controls the status when the Timesheet is Approved for an Employee’s own Timesheet. -
Use Time Entry Line Approval
This can only be selected when you have activated 'Time Entry Line Approval'. -
Save
Once you are satisfied with your selections, click on 'Save'.
Note: Looking at the Timesheet Status Maintenance will show you the statuses in your system. If an Employee has a status that has an order that is equal or lower to the timesheet they are trying to approve the system will display the ‘Skipped – Already at this Timesheet Status or Beyond’ messaging.